GEOANIMATOR JOURNAL
How to Add Images to Your Map Animation
Learn how to add images to your map animation using GeoAnimator on Android. Add photos, adjust timing, and create engaging animated map videos.

In this article9 sections
- 01Step-by-step: how to add an image to your map animation
- 02Why add images to a map animation?
- 03Using an image as a fill
- 04Using an image as a layer
- 05What images work best on a map?
- 06Ideas for using images in map animations
- 07Make the photo and the camera work together
- 08Keep it readable on a phone
- 09Frequently asked questions
Most map videos fall into the same gap. The country lights up, the camera pushes in, and the viewer is still looking at a coloured shape. Drop in the market you visited, the stadium, or an archive photo, and the shape becomes a place.
This guide shows you how to add images to a map animation in GeoAnimator, the Android map animation app from Lascade. It covers the exact steps, the two ways to use a picture, and the timing choices that keep photos from fighting your map.
Step-by-step: how to add an image to your map animation
Install the app and start a project. Get GeoAnimator from Google Play and start a new project.
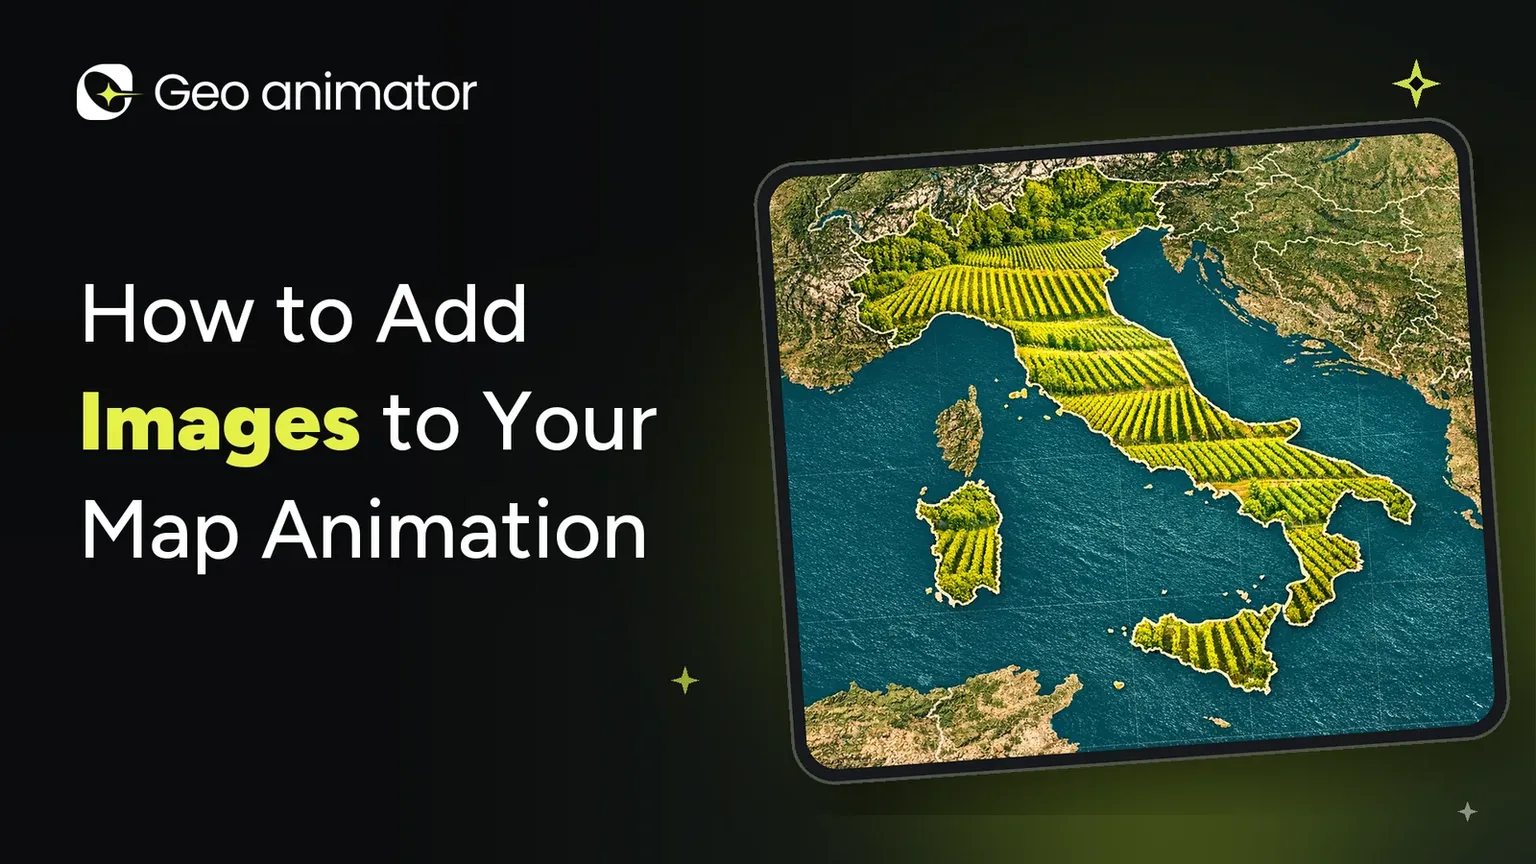
Search for your country or region and style its fill. Choose a solid colour, pattern, flag or image. If you want the photo inside the shape, pick image here.
Choose a reveal. Fade, Flood, Wipe or Chase decide how the highlight, and the photo inside it, appears. You can adjust direction, speed, intensity and softness.
Add camera keyframes. Set zoom, pitch and rotation, then pick a transition such as Orbit, Arc or Bounce. For a deeper walkthrough, see the map zoom effect tutorial.
Drop in text, labels or images. Arrange everything on the layered timeline so each element has its own clip.
Tap Image in the bottom toolbar and add your picture. This is how you add a photo as its own layer, separate from the country’s fill.
Press play to preview. Tap the play button at the left of the timeline and watch the full sequence with your image in place before you export.
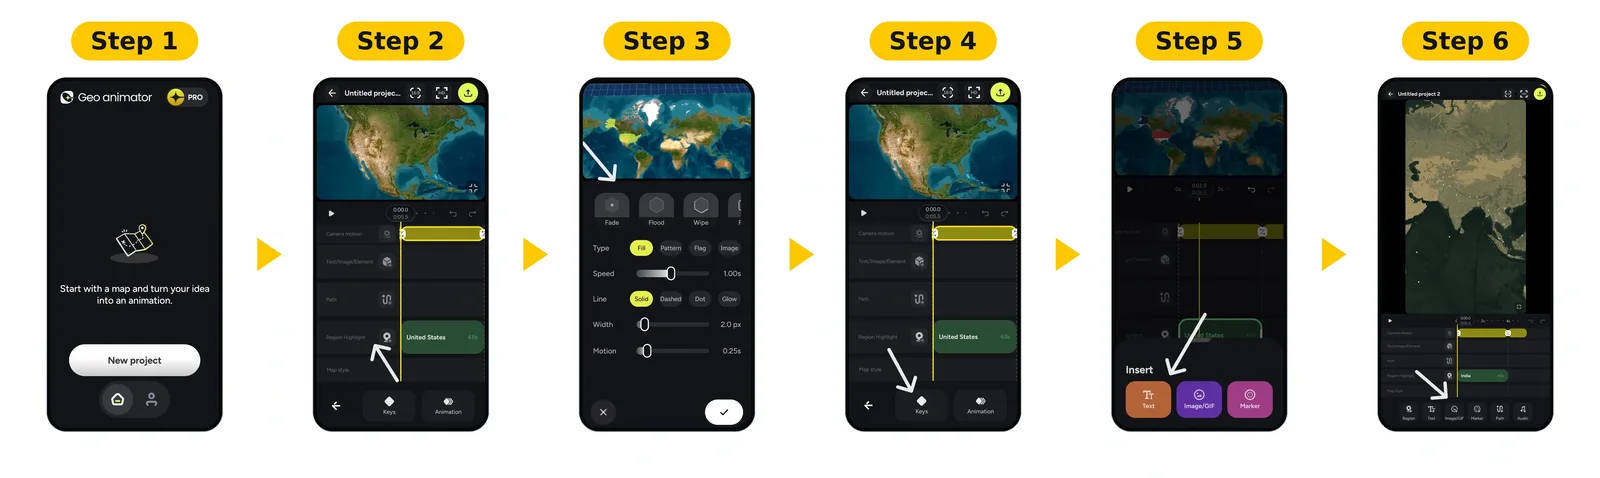
That’s the whole loop. The first project takes the longest, and most of the extra time goes into timing rather than styling.
Why add images to a map animation?
Images do three jobs a highlight can’t.
They add proof. A photo of the place shows the viewer you were there, or that the thing you’re describing is real.
They add emotion. A face, a landmark or a crowd gives people something to react to.
They add context. A historical photo, a logo or a product shot explains why the place matters.
A video that only shows shapes can feel like a diagram. Add one well-chosen image per idea and it starts to feel like a story.
Using an image as a fill
GeoAnimator offers four ways to fill a region: solid colour, pattern, flag or image. Fill and border colours have separate opacity controls, so you can keep a crisp edge even when the picture inside is busy.
Choose the photo for the shape, not the other way round:
Wide countries suit wide landscapes.
Tall, narrow regions need a photo with a strong subject near the centre, because the edges will be cut away.
Busy images need a darker, thicker border so the outline still reads.
If you’d rather use flags than photos, our guide to highlighting countries with flags covers that fill style. For a full build with reveals and borders, follow the country highlight map tutorial.
Using an image as a layer
The editor supports Text, Image and Element layers alongside your region highlights, and you can duplicate or delete elements as you refine the scene.
The duplicate option is more useful than it sounds. Once one photo frame looks right, copy it for the next, swap the picture, and every card in the video shares the same size and spacing.
When you place a layer:
Keep it beside the highlighted region, not on top of it.
Give it its own clip on the timeline so it can enter after the reveal and leave before the camera moves on.
Pair it with a short caption so the image has a clear job.
What images work best on a map?
Your own photos. They’re original, they’re yours to use, and they look different from every stock map video.
Photos with one clear subject. A close-up beats a wide shot full of small details at phone size.
Images with some breathing room. If the subject fills the frame edge to edge, cropping will cut it.
Consistent style. Photos with similar colour and lighting look like a set.
Ideas for using images in map animations
Travel stories. Show a photo at each stop, then connect them with a path. Our guide to adding routes to your map animation shows how.
Geography lessons. Fill each country with a landscape that represents it.
History videos. Place archive photos beside the regions they relate to.
Country comparisons. Fill two regions with pictures that show the difference.
Social clips. Use a single strong photo and a punchy caption for 9:16 posts.
News explainers. Pair a map with a portrait or a place photo to anchor the story.
For more ideas on formats, read map animations for video.
Make the photo and the camera work together
This is where map videos usually go wrong. The camera is moving, the photo is still, and the two compete.
Let the camera land first. Run your Push, Drift or Orbit move, settle on the region, then bring the image in.
Don’t cover the highlight. Frame the picture beside the region.
Hold long enough to read twice. If the photo carries a fact, give it a few seconds.
One photo per idea. Three images at once read as a collage.
Keep it readable on a phone
Most map videos are watched vertically, at arm’s length, often without sound.
Preview at phone size. What looks sharp in the editor can turn to mush on a small screen.
Keep captions short. Two lines is plenty, placed in the upper part of a 9:16 frame so platform buttons don’t cover them.
Check contrast. White text over a bright sky disappears, so use a darker photo or move the text.
Choose the right aspect ratio for your photos
The app supports 16:9, 9:16 and 1:1 projects.
16:9 landscape suits YouTube and presentations, and gives wide photos room.
9:16 vertical suits Reels, Shorts and TikTok, but crops wide photos hard.
1:1 square is a safe middle for social posts.
Pick your format before you place any images.
Add music once your images are in place
A finished map video needs a pace. After your images are placed and timed, add music to your map animation so the cuts land on the beat.
Common mistakes to avoid
A photo that fights the border. Busy images need a stronger edge.
Too many images at once. Pick the one that proves your point.
Covering the reveal. If the picture hides the highlight, the viewer loses the map.
Skipping the preview. Always play the whole sequence before exporting.
Not checking the export format. Confirm 16:9, 9:16 or 1:1 matches your platform.
Forgetting the watermark. Free exports carry a watermark, while Pro removes it and unlocks all map styles. Check the app for current plans.
Where to go next
More tutorials in the GeoAnimator Journal
Ready to try it? Download GeoAnimator and rebuild one scene you’ve already made with a photo. It’s the quickest way to see the difference.
Frequently asked questions
Can I add my own photos to a map animation?
Yes. GeoAnimator lets you use an image either as a fill inside a country or region, or as a separate image layer on the timeline.
How do I add an image to a map animation?
Start a project in GeoAnimator, select your region, and either choose an image fill or tap Image in the bottom toolbar to add a photo layer. Place it on the timeline and preview it with the play button.
Can I put a photo inside a country on an animated map?
Yes. Choose the image fill for a region, and the photo is cut to the country’s outline, with separate border colour and opacity.
What is the difference between an image fill and an image layer?
A fill sits inside the region and is cropped to its shape. A layer floats over the map as its own element, with its own clip and timing.
Can I animate how the image appears?
Region fills can use Fade, Flood, Wipe or Chase reveals. Layers have their own clip on the timeline, so you control when they enter and leave.